GPS, signature, and check-in fields
Use this for deliveries, training attendance, audit trails, consent, or proof of presence.
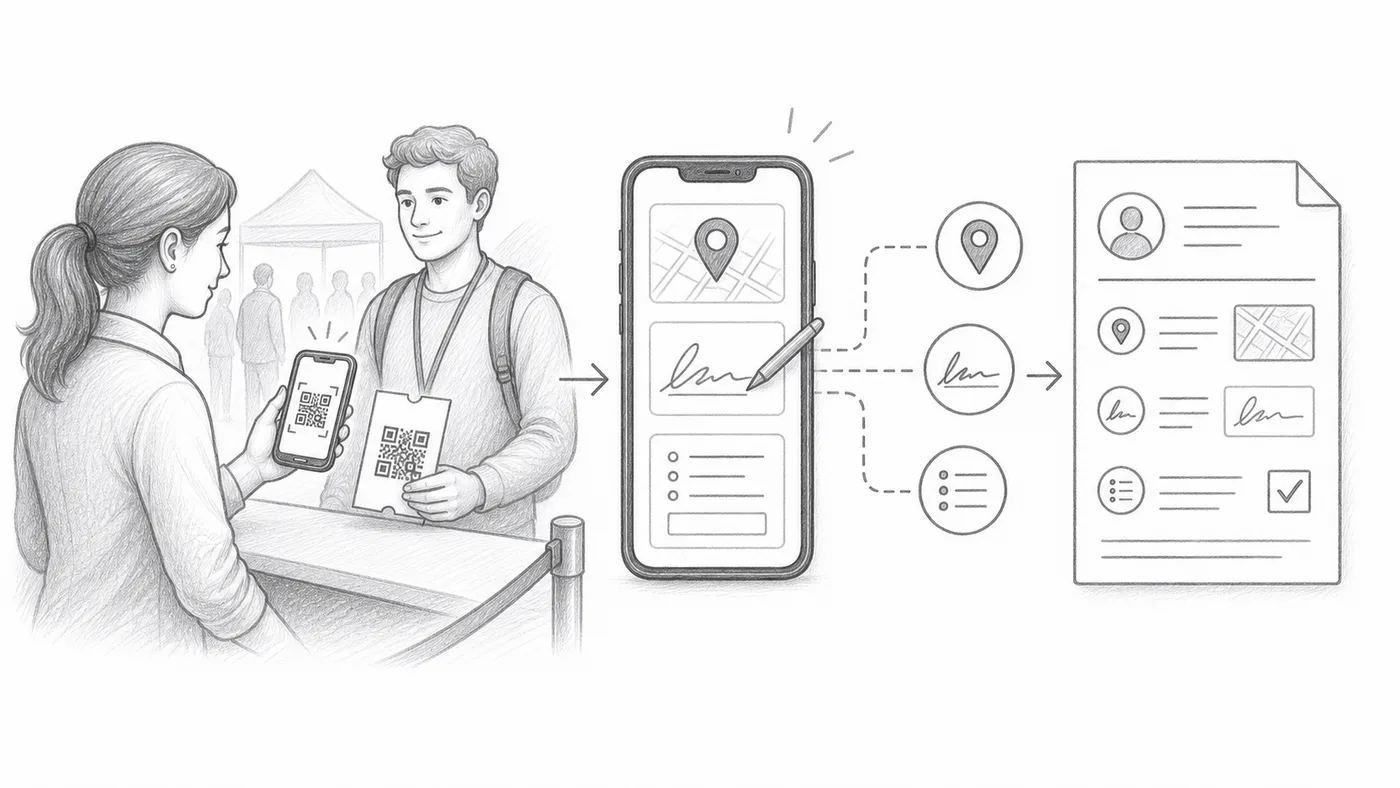
How it works
Scan ticket
Capture GPS
Collect signature
Report row updated
Step 1
Enable the capture options
GPS and signature are Extra settings. Custom check-in form fields are configured from check-in settings.
Step 2
Train staff on the extra step
Each scan may require location permission, a signature, or field entry.
Step 3
Review reports
Captured values appear in check-in reports next to the scan history.
Example
A scan for Ada Mensah can include timestamp, staff account, GPS, signature, and custom answers.
Avoid these mistakes
- GPS needs device permission and may be unavailable indoors.
- Extra required fields slow down the check-in line.
- Use restricted staff accounts when collectors should only scan.
Next step
Ready to get started with QR code tickets?
Create QR code tickets for Google Sheets, Google Forms, or Jotform. Pick the workflow you already use, then keep your attendee list in one place.