
You're probably in one of two situations right now. Either you need a clean RSVP and check-in system for a free event, or you've looked at ticketing platforms and realized the “free” plan often stops being simple the moment you need branding, QR check-in, or reliable door control.
That's where a DIY setup makes sense. If you already work in Google Forms and Google Sheets, you can build an online event ticketing system free of software subscriptions, keep your attendee data in tools your team already knows, and still run a professional check-in flow. The trick is knowing which parts are easy to DIY, and which parts turn into a mess if you skip them.
Most guides stop at “make a form and email people a confirmation.” That's not enough for a real event. A usable system has to handle registration, unique ticket generation, email delivery, duplicate prevention, and check-in when the venue internet decides to disappear at the worst possible moment.
Table of Contents
- Why You Dont Need a Big Budget for Ticketing
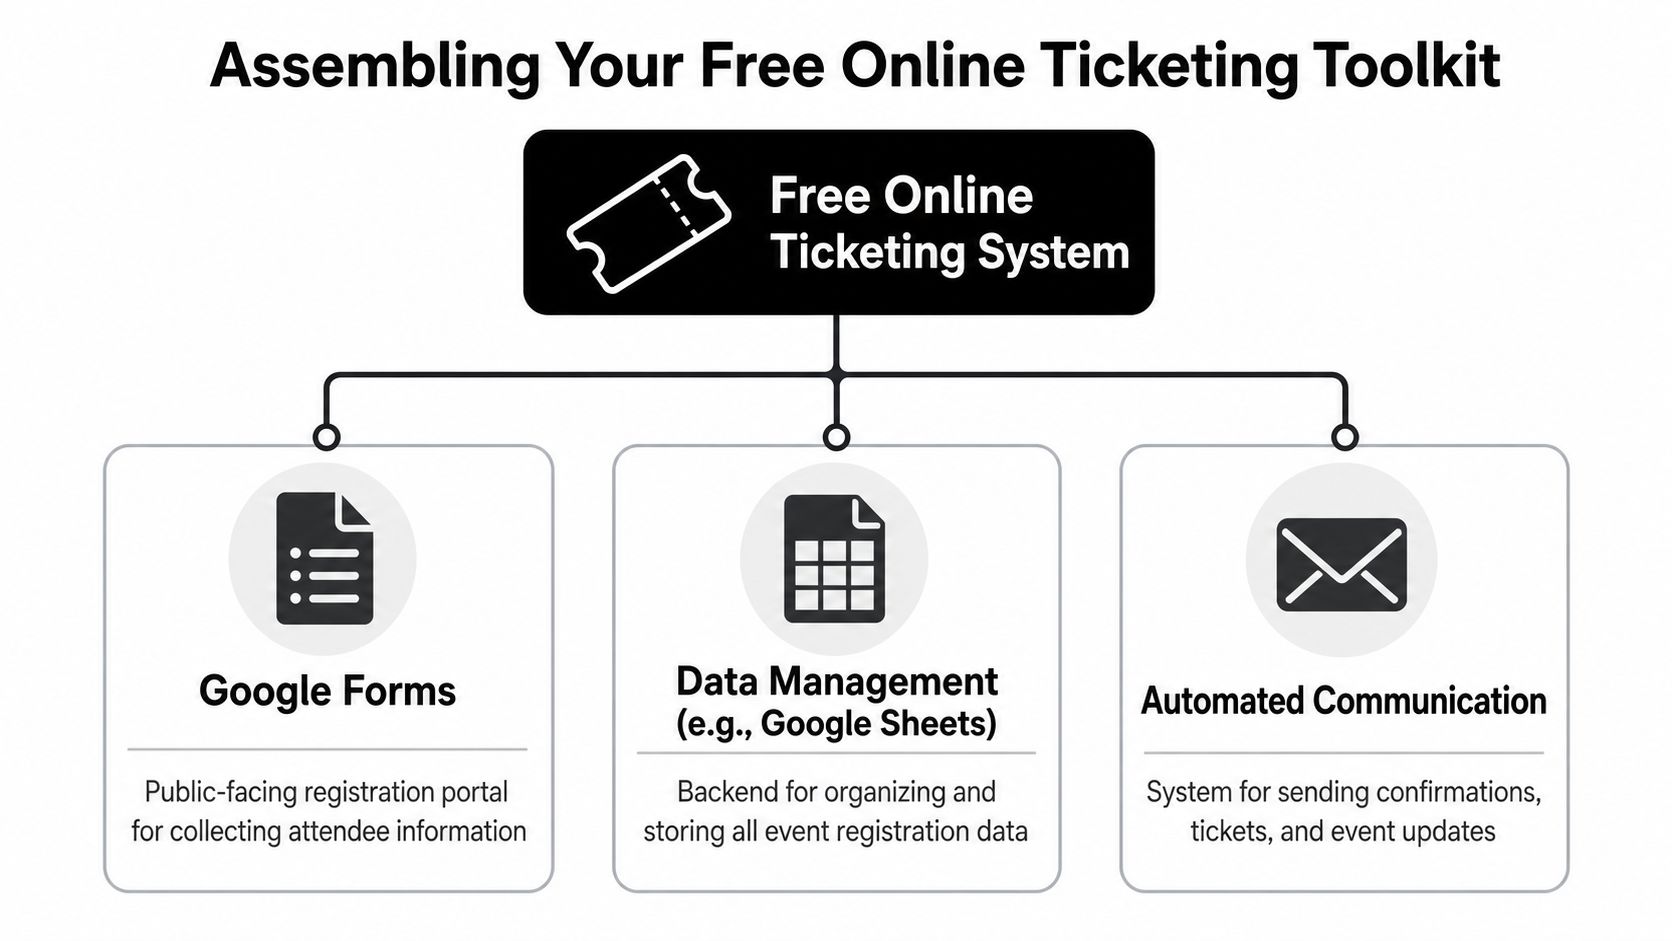
- Assembling Your Free Online Ticketing Toolkit
- Building Your Registration and Ticket Generator
- Designing and Distributing Professional Tickets
- Managing Event Check-In With or Without Internet
- When to Upgrade Your Free Ticketing System
- Frequently Asked Questions
Why You Dont Need a Big Budget for Ticketing
You open check-in at 8:30. One volunteer has an iPhone, another has an aging Android, the venue Wi-Fi is unstable, and twenty attendees are already in line asking where their tickets are. That is the moment your ticketing setup gets tested. For many free events, a paid platform is not what saves the day. A clear workflow does.
I have seen small teams run school events, community workshops, church programs, internal trainings, and local conferences with no ticketing budget at all. The setups that hold up under pressure usually rely on tools the team already knows, not software they barely had time to configure. Google Forms and Google Sheets are often enough to collect registrations, assign each attendee a unique record, and keep the guest list under control.
What matters is operational discipline. One form. One attendee list. One check-in method. One fallback if internet drops.
That last part gets ignored in a lot of free ticketing advice. It should not. A zero-cost system is only credible if it still works when a scanner loses signal or a staff member has to verify a guest from a phone at the door. If your process only works under perfect conditions, it is a demo, not a ticketing system.
Free tools are a good fit when your event needs the basics done well: controlled registration, unique entry passes, and a reliable record of who arrived. They are a poor fit when you need reserved seating, multi-tier pricing, built-in refunds, sponsor dashboards, or heavy-volume support on event day. That is the trade-off.
Practical rule: Keep one source of truth. For most DIY setups, that should be a single Google Sheet that your team treats as the final attendee list.
The common failure point is not price. It is process drift. One volunteer checks people in from an email inbox, another marks arrivals on paper, and someone else edits the spreadsheet later. That is how duplicate entries, long lines, and bad attendance records happen.
A free setup needs five parts working together:
- Registration capture: A public form that collects clean, consistent attendee details.
- Central attendee list: A sheet that updates automatically and stays usable under pressure.
- Unique ticket assignment: One ticket linked to one person, with no guesswork at the door.
- Validation at entry: A way to confirm the ticket is real and mark it as used.
- Offline fallback: A backup process for weak signal, dead batteries, or venue internet problems.
Build those pieces well and a no-fee online ticketing system can handle real event-day conditions, not just signups. It will not replace a specialized platform for every event. It does not have to. The goal is simple: get people registered, get them through the door, and know who showed up without spending money you do not have.
Assembling Your Free Online Ticketing Toolkit
A free setup works best when every tool has one job and your team knows where the final attendee record lives. The stack does not need to be fancy. It needs to hold up when the Wi-Fi drops, a volunteer checks in from a phone, and someone asks whether a ticket was already used.
Google's free tools cover the core well enough for small and medium events. The trick is choosing the fewest moving parts possible, then stress-testing the handoff between them before event day.
What each tool does
Google Forms collects registrations reliably and sends them into a structured response sheet. It is quick to publish, easy to update, and familiar to volunteers who have never touched event software before.
Google Sheets is the control room. Use it to store ticket IDs, track status, filter by session or role, and keep one clean attendee list that the whole team trusts.
A Google Workspace add-on or light automation layer handles the jobs Forms and Sheets do not handle well by themselves. That usually means generating unique ticket codes, creating QR images, emailing tickets, and syncing scans back to the same record. If you want a working example of that approach, this free event ticketing system setup guide for Google-based workflows shows the model clearly without adding a full event platform.
The hard part is not collecting names. It is keeping registration, ticket delivery, and check-in tied to the same record under pressure.
Why this toolkit is practical on a zero budget
This model keeps showing up because it matches the way small teams work. A school event, local meetup, church conference, charity fundraiser, or community workshop often already runs on Google Workspace. Staying inside that environment cuts training time and reduces the chance that somebody exports the wrong CSV five minutes before doors open.
There is also a real operational benefit. Spreadsheet-based systems are easier to patch when something goes wrong. If a ticket type needs to change, a name is misspelled, or a volunteer needs a filtered check-in view, you can usually fix it in the sheet instead of opening a support ticket and waiting.
That flexibility has a cost.
| Component | What works well | Where it gets annoying |
|---|---|---|
| Google Forms | Fast to launch, easy to share, familiar on mobile | Limited branding and weak conditional logic for more complex registration flows |
| Google Sheets | Flexible filtering, formulas, live updates, exports | Breaks down if too many people edit carelessly or overwrite formulas |
| Add-ons or automations | Unique ticket creation, QR generation, email delivery, scan logging | Quality varies a lot, and setup mistakes usually show up on event day |
I have seen free setups run cleanly for hundreds of attendees. I have also seen them fall apart because the team kept adding “just one more workaround” until nobody knew which sheet was current.
A disciplined DIY toolkit is a strong fit when you need free registration, basic ticket types, QR-based entry, and an offline backup plan you can control yourself. It starts to strain when you need reserved seating, timed entry rules across multiple days, refund workflows, sponsor reporting, or heavy on-site traffic with several doors scanning at once. That is usually the point where a specialized platform earns its cost.
Building Your Registration and Ticket Generator
The build starts before you touch a QR code. If the registration logic is sloppy, the tickets will be sloppy too.
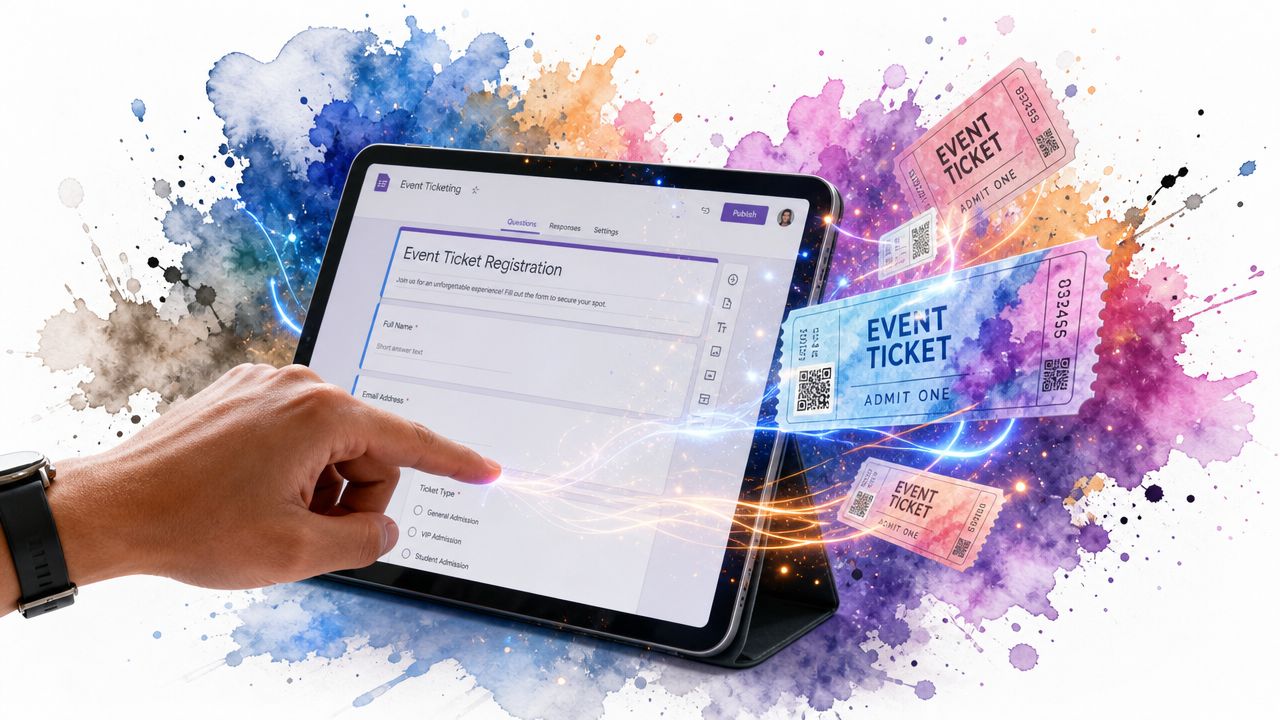
A dependable setup follows a structured workflow: decide ticket types, select a platform, customize options, integrate secure payments if needed, automate e-ticket delivery, deploy QR scanning, and use analytics to monitor performance. That workflow is outlined in this guide to creating an online ticketing system.
Start with the registration logic
Open Google Forms and decide what one valid registration should contain. Keep it lean. Every extra field lowers completion quality unless it's useful on event day.
A practical registration form usually includes:
Full name
Use a required short-answer field.Email address The ticket will be delivered here. Turn on response validation so junk emails don't poison the sheet.
Ticket type or attendee role
Good examples are General Admission, VIP, Student, Speaker, Staff, or Parent Guest.Session or day selection
Only include this if access changes by date, room, or entry window.Quantity rules
If one person can reserve for others, define that clearly. If not, limit it to one response per attendee.
Then connect the form to Google Sheets. That sheet becomes your master list. Don't create separate sheets for “registrations,” “confirmed,” and “checked in” unless you enjoy reconciliation headaches.
Turn form entries into scannable tickets
Every attendee needs a unique identifier. In a DIY setup, that usually means one row equals one attendee, and one attendee equals one QR code.
A clean row structure often looks like this:
| Column | Purpose |
|---|---|
| Timestamp | Original registration time |
| Full Name | Attendee name |
| Ticket delivery address | |
| Ticket Type | Access category |
| Event Date or Session | If applicable |
| Ticket ID | Unique row-based or generated code |
| QR Code | Encoded image or link |
| Ticket Sent | Yes or No |
| Check-In Status | Not checked in or checked in |
That structure sounds simple because it is. The discipline comes from not improvising later.
For the unique ID, don't rely on someone's email alone. Create a dedicated ticket code field. That gives you a stable key for QR generation and later check-in validation.
Add the missing automation layer
A specialized add-on earns its place. Google Sheets can store attendee data, but it doesn't become a working ticket engine until something generates the code, inserts it into a ticket template, and helps deliver it.
Use a tool built for QR code tickets for Google Sheets so each new form submission can become a unique, scannable pass without manual design work for every attendee. The practical win here isn't novelty. It's consistency. Every row gets treated the same way.
Common setup tasks inside the add-on include:
- Choose the data source: Point the add-on at the response sheet.
- Map the unique field: Use your Ticket ID column as the encoded value.
- Build the output: Decide whether the ticket is an image, PDF, or email-friendly layout.
- Set the trigger: Run on every new response or in controlled batches.
- Write back status fields: Mark whether the ticket was created and sent.
A short walkthrough helps if you want to see the moving parts before building your own:
The setup that usually works best on a zero budget is not the flashiest one. It's the one that removes handwork. If a volunteer has to manually copy codes into emails, your system is still fragile.
Build for the busiest hour of the event, not the calm hour when you're testing alone.
Once your form creates rows, your sheet stores status, and your add-on generates QR tickets automatically, you've crossed the line from “RSVP list” to actual ticketing system.
Designing and Distributing Professional Tickets
Attendees don't judge your backend. They judge the ticket they receive.
If the ticket looks confusing, lacks event details, or gets trapped in spam, your free system will feel amateur no matter how clever the setup is behind the scenes. The good news is you don't need a designer or a full event platform to make tickets look organized.
Keep the ticket layout practical
A ticket only needs a few things to do its job well:
- Event name
- Date and time
- Venue or access instructions
- Attendee name
- Ticket type
- Unique QR code
- Brief support contact
That's enough for most free events. Resist the urge to cram sponsor logos, long policy text, and a full agenda onto the ticket itself.
If you're creating a printable ticket or flyer-style pass, layout matters more than decoration. A quick refresher on understanding standard flyer sizes helps if you're choosing between a digital-only ticket, a half-sheet handout, or a badge insert that staff might print onsite.
For branding, stick to one logo, one headline font, and one accent color. Clutter makes scanning harder because the QR code competes with everything else on the page.
A clean ticket earns more trust than a fancy ticket with bad hierarchy.
If you're using a Google Workspace-based setup, a tool such as QR code attendance for Google Forms or QR code for event tickets and passes can pull row data into a branded template so each attendee gets a personalized pass without manual editing.
Automate delivery without making emails look spammy
Email delivery is where many DIY systems wobble. The fix is simple. Send short confirmation messages that look like operational emails, not marketing blasts.
A strong confirmation email includes:
A plain subject line
Example: “Your ticket for Spring Seminar”A short opening
Confirm the registration in one sentence.The ticket attachment or embedded image
Don't make people hunt through links if you can avoid it.Arrival instructions
Mention opening time, parking, entry gate, or what to bring.A support reply address
Use a monitored inbox.
Google Apps Script can handle this if you're comfortable with it. A mail merge add-on can also work. The key is tying each outgoing email to the attendee row, then writing back a sent status so you don't send duplicates by accident.
To keep emails out of spam folders:
- Use a recognizable sender name
- Keep the message short
- Avoid image-only emails
- Test with a few personal addresses first
- Send in batches if you're doing a large list
For very small events, manual sending is fine. Once you move beyond that, automation stops being a convenience and becomes part of quality control.
Managing Event Check-In With or Without Internet
Check-in is where free systems either prove themselves or fall apart.
Plenty of organizers assume a free setup means you must have stable internet at the door. That assumption causes trouble. According to this analysis of free ticketing system limitations and offline risk, 42% of hybrid events face network failures at entry points, which can cause 15 to 30 minute check-in delays. The same discussion points out that many free platforms don't offer offline validation with real-time sync back to a central source like Google Sheets.
What a working check-in flow looks like
The cleanest approach is to let staff scan from their phones against the same attendee list used for registration. A proper QR code ticket check-in for Sheets setup should do three things in one action:
- confirm the code exists
- confirm it hasn't already been used
- write the check-in result back to the sheet
That last part matters. If one staff member checks in a guest on one device, every other scanner should reflect that as soon as possible. Otherwise, duplicate entry becomes a door policy problem instead of a technical one.
For internet-connected venues, a browser-based scanner tied to your sheet is often enough. For tougher venues, use a setup that supports offline QR code ticket check-in documentation for Google Sheets workflows.
What to do when internet fails
Offline validation is the difference between a system that demos well and one that survives event day.
A practical fallback looks like this:
- Preload attendee data: Make sure scanning devices have the latest list before doors open.
- Use cached validation: The scanner should still know whether a ticket is valid even without live internet.
- Log scans locally: Each device needs to store check-ins temporarily.
- Sync after reconnection: Once service returns, the results should write back to the main sheet.
If your venue is remote, outdoors, or crowded, don't gamble on building Wi-Fi from scratch at call time. Renting a backup connection can save the whole entry process. This guide to Forever Party Rentals Starlink service for event Wi-Fi is useful for understanding when temporary connectivity support makes operational sense.
A free system can absolutely handle the door. What it can't handle is wishful thinking. If you know your venue has weak service, build for offline first and treat live sync as a bonus.
When to Upgrade Your Free Ticketing System
DIY is strong up to a point. After that, “free” starts charging you in admin time.
The problem isn't usually registration. It's everything around it. Multi-day access rules, zone-based entry, staff permissions, badge printing, late edits, and reconciling what happened at the door can turn a simple sheet into a brittle system fast.
The hidden cost of staying DIY too long
Benchmark data shows the upside and the limit. Free ticketing platforms can reach a 92% check-in success rate with QR scanning, but 34% of events still run into pitfalls, including duplicate tickets at 12% and offline scanning failures at 15%, according to free ticketing software benchmarks on Capterra.
That doesn't mean free tools are bad. It means protocol matters.
I'd keep a DIY Google setup for straightforward events where the rules are simple and the team is comfortable inside Sheets. I'd stop stretching it when any of these start showing up:
- Multiple access layers: Different days, rooms, meal access, VIP zones, or staff-only entries.
- Heavy live changes: Last-minute swaps and onsite edits by several staff members.
- Large volunteer teams: Too many hands touching one spreadsheet without process control.
- Check-in risk: Venues where duplicate prevention and offline reliability can't be improvised.
- Reporting pressure: You need clean attendance records immediately after the event.
There's another hidden cost that catches professional teams. If your ticketing tool doesn't live comfortably inside Google Workspace, people spend time exporting, importing, and fixing mismatched attendee lists instead of running the event. A hybrid option can reduce that operational drag by keeping the data in Sheets while adding purpose-built ticketing and check-in tools.
A tool like Darkaa fits that middle ground. It works through Google Sheets and Forms add-ons, supports branded PDF or image tickets, offline validation, real-time sync back to Sheets, and unlimited concurrent devices, while staying usage-based and free for up to 10 attendees.
Ticketing System Feature Comparison
| Feature | DIY Google System | Darkaa (Hybrid) | Traditional Platform (e.g., Eventbrite) |
|---|---|---|---|
| Registration form | Google Forms | Google Forms and Sheets based | Built-in event page |
| Attendee database | Google Sheets | Google Sheets | Platform dashboard |
| Learning curve | Low for Google users | Low if your team already uses Google Workspace | Varies by platform |
| QR ticket generation | Requires add-on setup | Built into add-ons | Usually built in |
| Offline check-in | Possible, but only with the right tool and setup | Supported | Depends on platform |
| Real-time sync to Sheets | Manual or add-on dependent | Native to the workflow | Usually export-based |
| Complex access control | Hard to maintain manually | Better suited for sessions and zones | Often supported |
| Best fit | Small free events with simple rules | Teams that want Google-based operations with stronger event-day control | Organizers who want an all-in-one hosted platform |
The upgrade point is simple. If your team spends more time maintaining the system than using it, the free setup has done its job and it's time to move on.
Frequently Asked Questions
Can I run an online event ticketing system free without coding
Yes. A workable setup starts with Google Forms for registration, Google Sheets for the attendee list, and a no-code add-on for ticket generation and check-in. I have seen that stack hold up well for small events, as long as one person owns the sheet structure and nobody starts making side copies.
Is Google Forms enough on its own
No. Google Forms collects responses well, but ticketing breaks down after that. You still need unique ticket IDs, a clean delivery method, and a check-in process that does not collapse when the venue Wi-Fi does.
Should I send PDF tickets or image tickets
Use the format your audience and check-in crew can handle without confusion. PDFs are better for printing and tend to look more formal. Image tickets are faster on phones, which matters if your line builds up and half your attendees are opening passes from email on weak mobile data.
What's the biggest mistake in a DIY ticketing setup
Running the event from multiple attendee lists.
That is how duplicate tickets, bad scans, and manual cleanup creep in. Keep one master sheet, lock down who can edit it, and test the full flow before event day with a few fake registrations.
Can this work for paid events too
It can, but free systems start to strain once money is involved. Payments, refunds, taxes, and settlement create admin work that a DIY setup does not handle cleanly. For free events, the trade-off is usually worth it. For paid events, the hidden cost is often your time.
How do I know when I've outgrown the free setup
The answer is operational, not technical. Upgrade when your team is spending more time patching the process than running the event, or when offline check-in, access rules, and live edits need tighter control than a sheet can give you without constant supervision.
If you want to stay inside Google Workspace, keep the workflow simple and choose tools that solve the weak spots a basic DIY stack leaves behind, especially on check-in day. That is the line I use. Start free, test it under real conditions, and switch to a dedicated setup as soon as reliability becomes harder to maintain than the budget you were trying to save.