Send your first QR code tickets from Google Sheets™
Follow these steps once, with a short test list. At the end you will have sent a real ticket and checked it in, so you know exactly what your guests and your staff will see.
How long it takes
About 10 minutes
What you need
- A Google™ account, signed in to only one account in this browser.
- A spreadsheet with your guests, one line per person, and a title on the first line of each column.
- A phone with a camera, to play the part of your check-in staff.
-
Step 1 of 7
Install the add-on and open it
Install QR Code Ticket Per Row from the Google Workspace™ Marketplace, then open your spreadsheet and start the add-on from the Extensions menu. It opens as a panel on the right of your sheet.
You should now see: You see the add-on panel next to your data.
-
Step 2 of 7
Point the add-on at your guest list
Choose the sheet that holds your guests. If you have no list yet, use the button that adds sample guests, so you can try everything safely.
You should now see: The add-on shows how many guests it found, and the names of your columns.
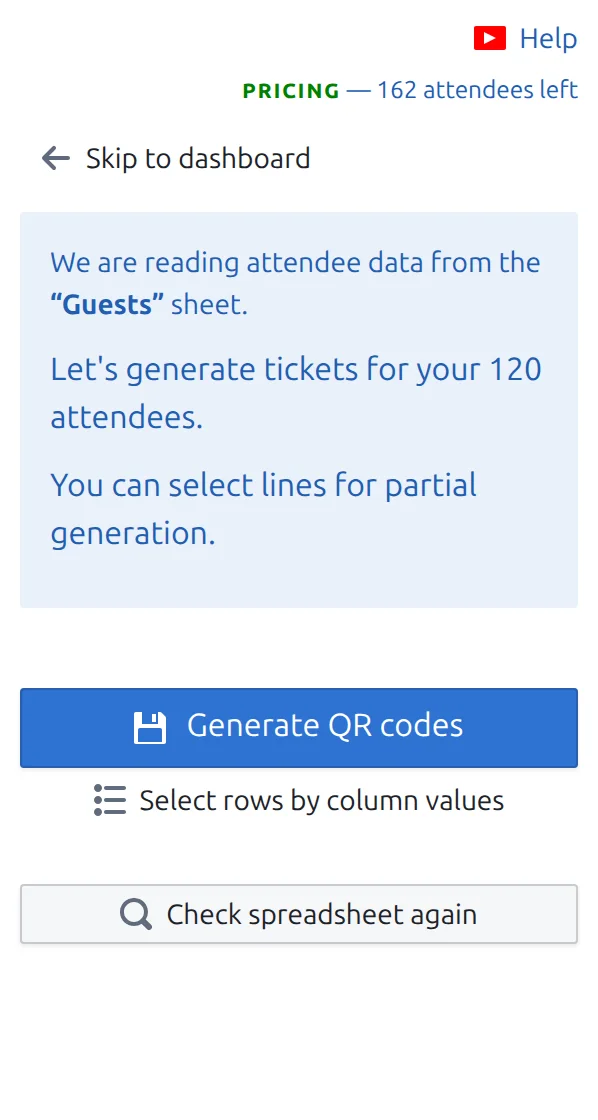
The add-on tells you which sheet it will use, and how many guests are on it. Tap it to see it bigger. -
Step 3 of 7
Create the QR codes
Press the button to create the missing codes. The add-on adds a few columns to your sheet, including a personal ticket link for each guest.
You should now see: Each line now has a tracking code and a link to that guest's ticket. Open one link to see the PDF ticket.
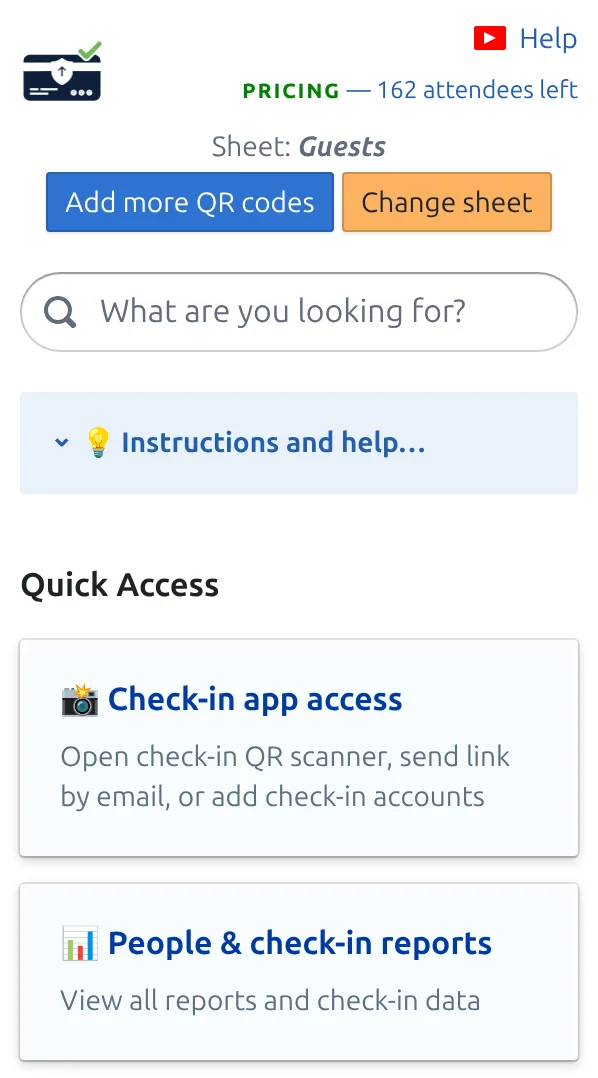
Once your codes exist, the panel becomes your dashboard. Every task has its own card. Tap it to see it bigger. -
Step 4 of 7
Make the ticket look like your event
On the Ticket design page, add your logo and choose which columns appear on the ticket, for example the guest name and their ticket type. The preview updates as you change things.
You should now see: The preview shows your logo and the right guest details.
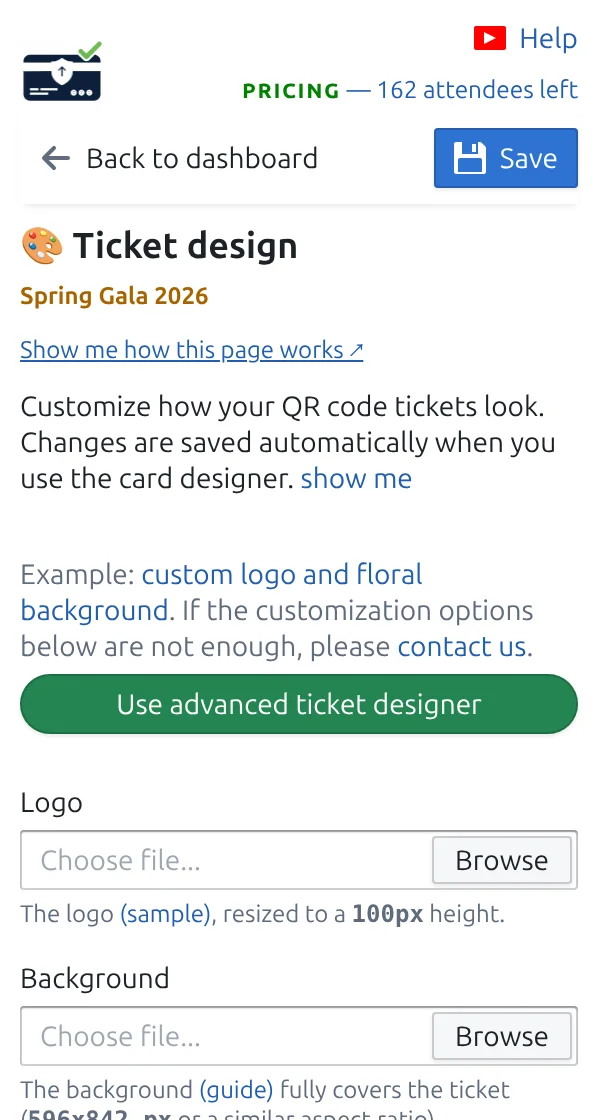
Ticket design: add your logo, then choose what appears on the ticket. Tap it to see it bigger. -
Step 5 of 7
Send one ticket to yourself
Put your own address on one line of the sheet. On the Send tickets by Email page, choose your email column, write a short message, and send to that line only.
You should now see: You receive the email with the ticket attached as a PDF.
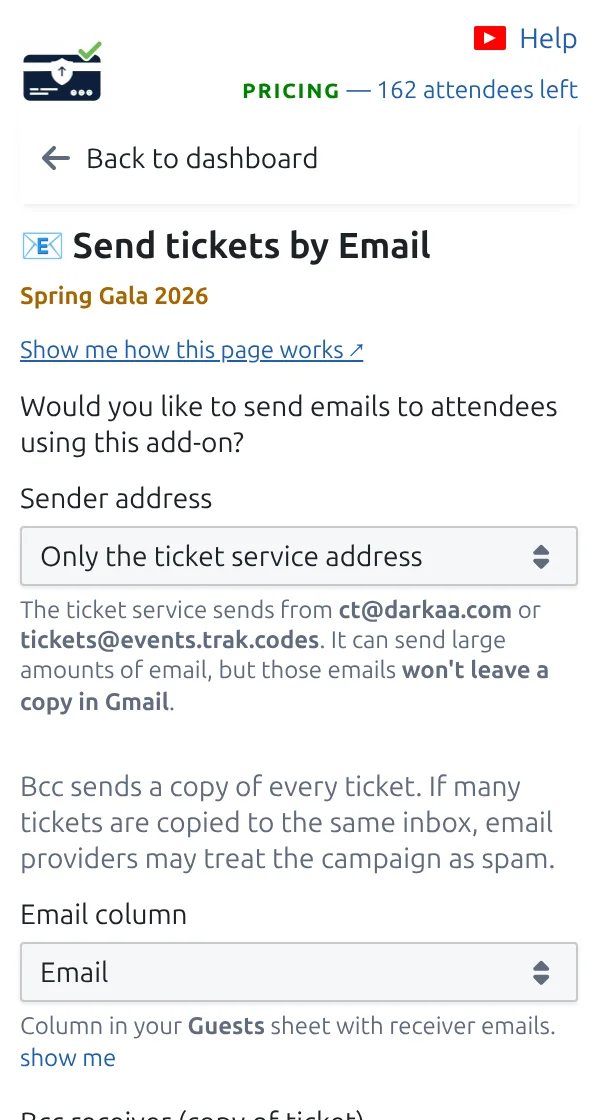
Pick the column that holds guest addresses, write your message, then send. Tap it to see it bigger. -
Step 6 of 7
Scan that ticket with your phone
On the Check-in app access page, open the scanner on your phone and allow the camera. Show it the QR code from the ticket you received.
You should now see: You hear a confirmation sound and see the guest name. In your sheet, that line changes to checked in.
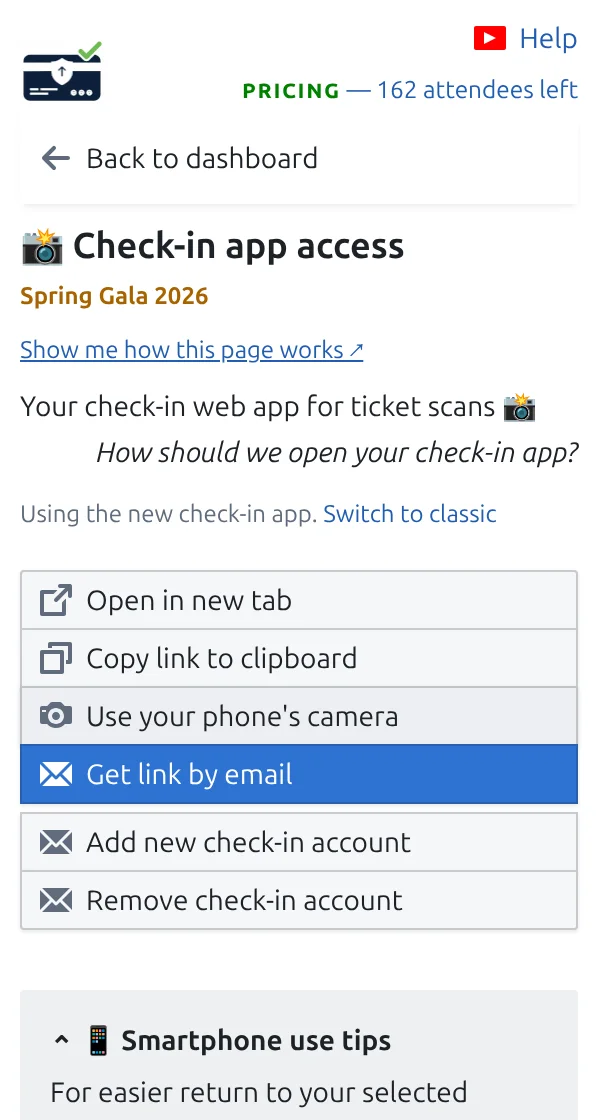
Open the scanner on your own phone first, before sharing it with your team. Tap it to see it bigger. -
Step 7 of 7
Clear the test before the real event
On the Remove tickets & check-ins page, clear the check-ins, or the whole test list if you used sample guests. Then put your real guests in the sheet.
You should now see: Your reports start from zero on event day.
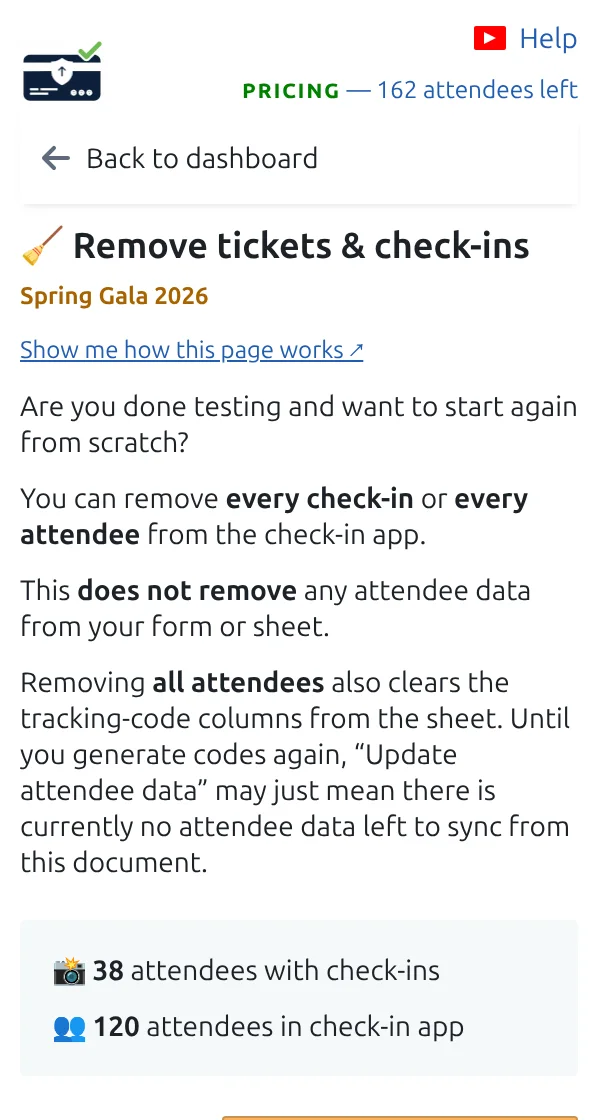
Clear your test before the real event, so your numbers start from zero. Tap it to see it bigger.
Where to go next
Next step
Ready to get started with QR code tickets?
Create QR code tickets for Google Sheets, Google Forms, Jotform, Tally, Fillout, or WordPress. Pick the workflow you already use, then keep your attendee list in one place.